
Whilst I regard my “proper” camera as one of my prized possessions, I have definitely become a convert over the last year or so to Smartphone photography. The newer models of phones – whether iPhone or Android – are remarkable in terms of what they can achieve. The most important feature of all scores 10/10 – we always have them with us, so it’s really a no-brainer to get to grips with what that camera in your pocket can really do for you. This post is to give you just a few tips about how to get the most from your Smartphone camera so that you can really take photos like a Pro! All photos below were taken during the last year of Lockdown using an iPhone X or iPhone 11.
Get to know your camera
It’s definitely worth exploring some of the functionality within your smartphone camera. They do a pretty good job just on auto, but there is a huge amount you can do to enhance your image. Here are just a couple of really key pointers:
- Understand what you are focussing on and adjust light levels if necessary. For most phones, this means you tap on the screen on the area you want to be in focus and well lit. The phone will make an assumption about what you want in focus but it works on averages and you may want to adjust … average photos are not what you are after! If it is too dark then you can adjust by dragging upwards or downwards – the effect is visible on the screen.
- Explore what editing features are available to you. At the very least I would recommend you CROP your photo and apply the “magic wand” …. and also explore some of the other tools. My favourites are Shadows, contrast, vibrance and colour temperature. There are also some pretty cool external apps you can use to edit, but to be honest, I would explore the edit functionality within your phone before you go ‘off-piste!’ If you want to do even more with editing then there are lots of external apps available that can do all sorts of cool things. Snapseed is my favourite and is free.
Camera Angle

It’s all about the light
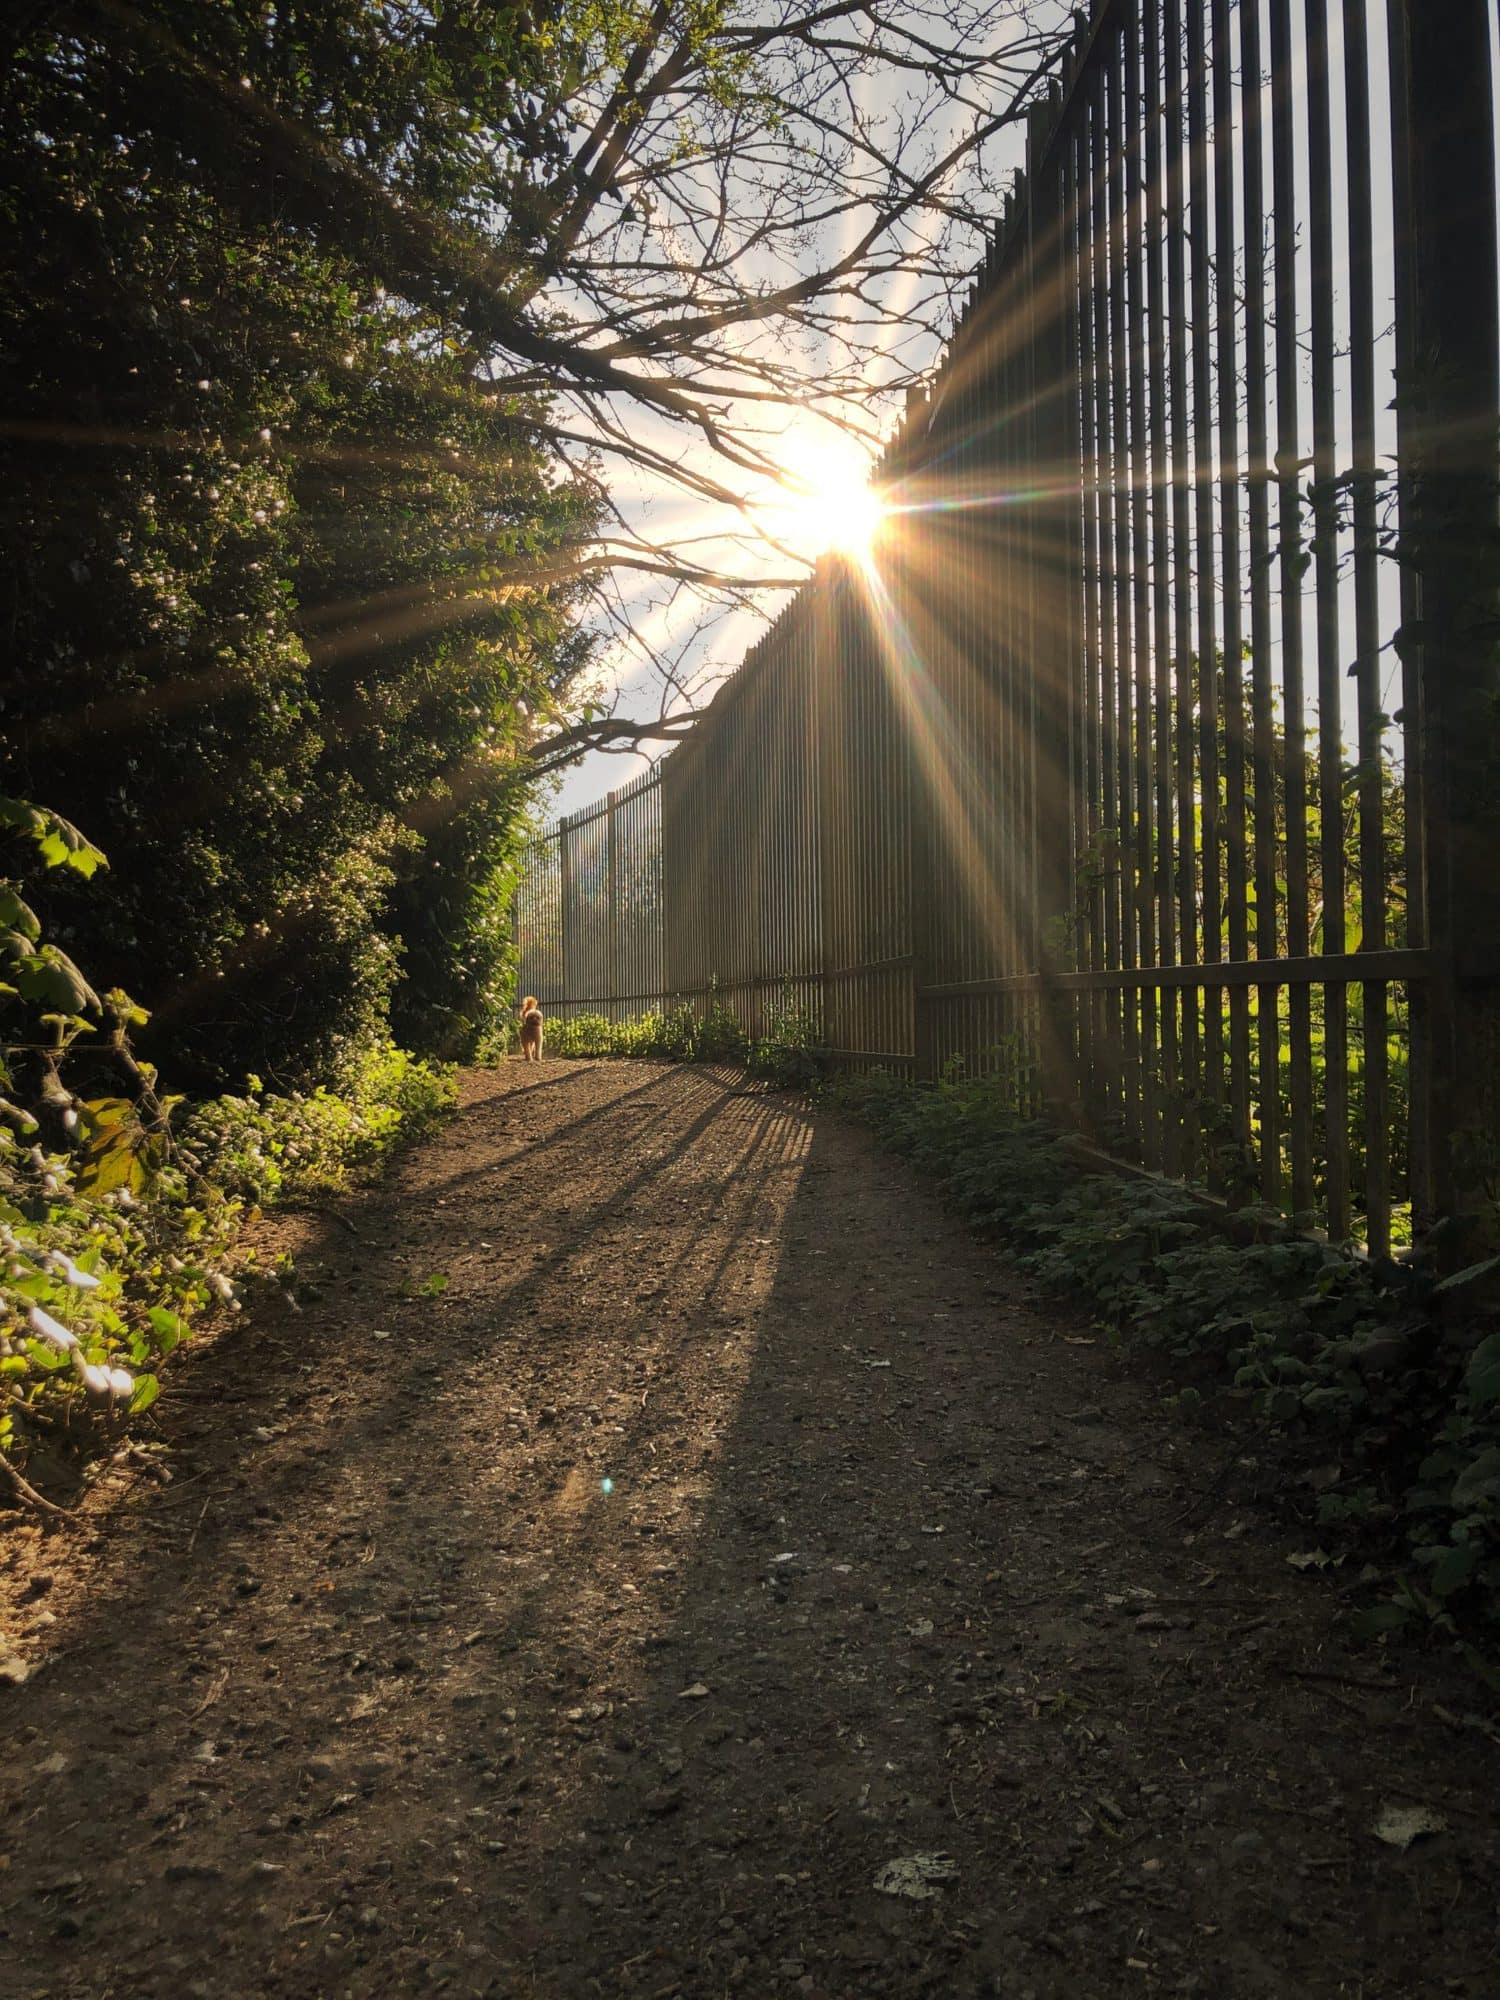
Photography is all about the light – and using the light to your advantage will make the difference between great and terrible photos. One way you can have fun with the light is by creating silhouettes. This is done by pointing your camera INTO the sun …. effectively the lens is so overwhelmed by the brightness of the sun that anything in the foreground will be massively underlit – giving you a silhouette. When taking photos of sunsets, you will achieve best results by tapping the screen on the area of sky with the best colour and adjusting the light levels for optimum depth of colour.


Composition
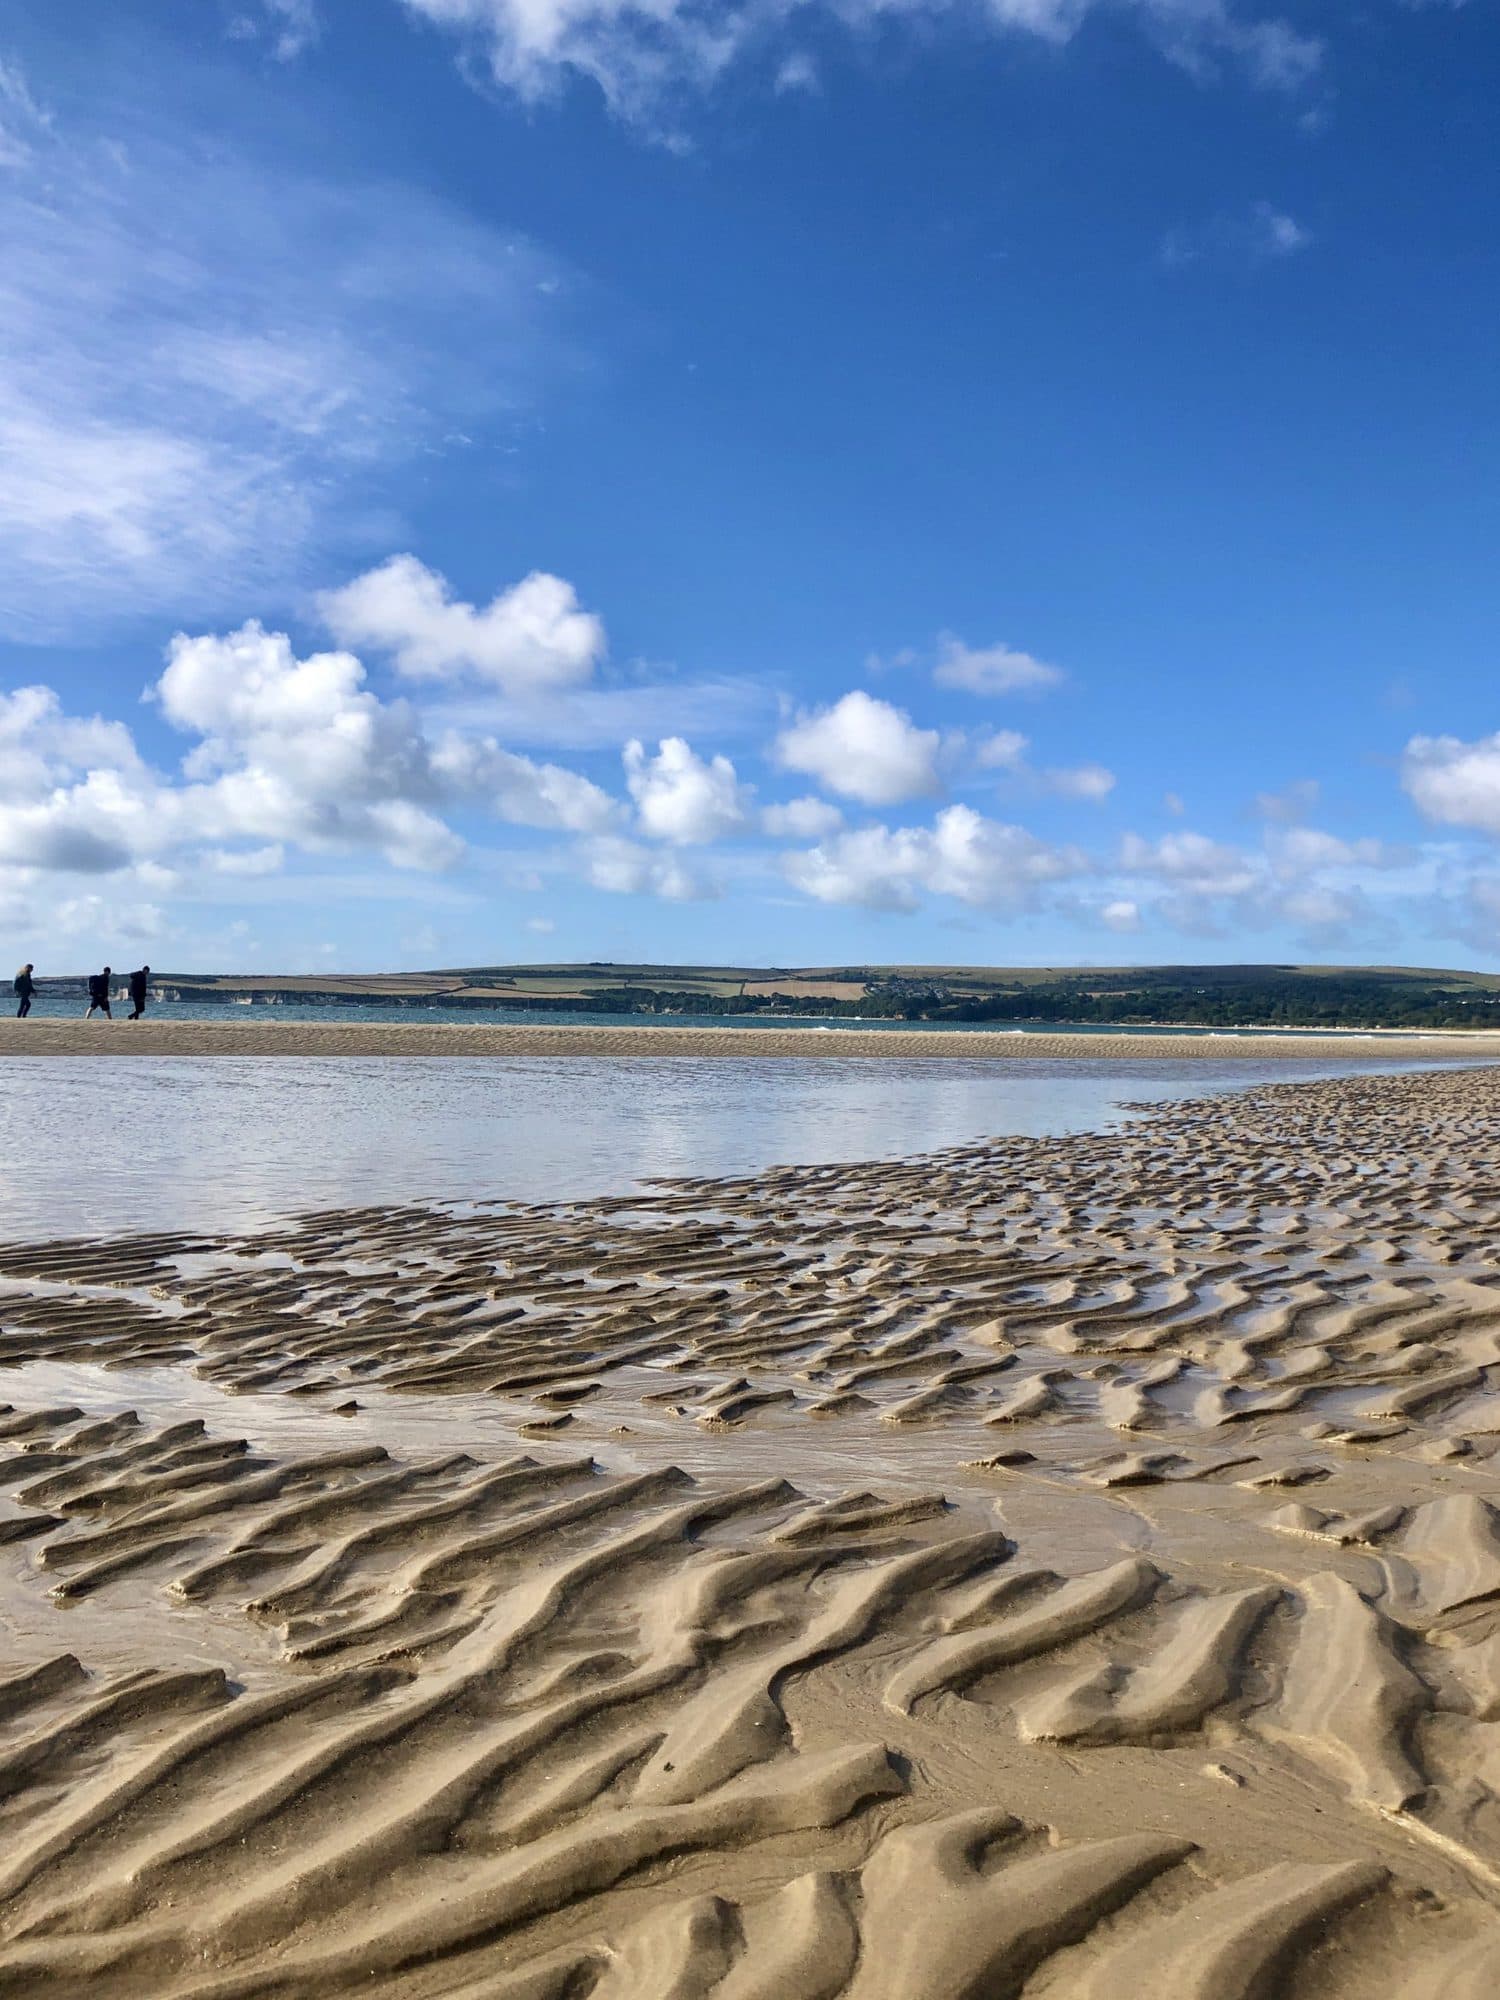
There are many rules of composition, some of which you may already be aware of, perhaps without realising. The most popular ones include the rule of thirds, leading lines, symmetry and patterns and texture. There are many articles online exploring these topics if you are interested and following some of these can really enhance your photography.
Leading lines will draw you into a photograph and can be found in all sorts of natural features – paths, walls, railings, roads, streams. They add depth and interest to your photos.
Texture can be found to also add interest to an image.
Portrait Mode
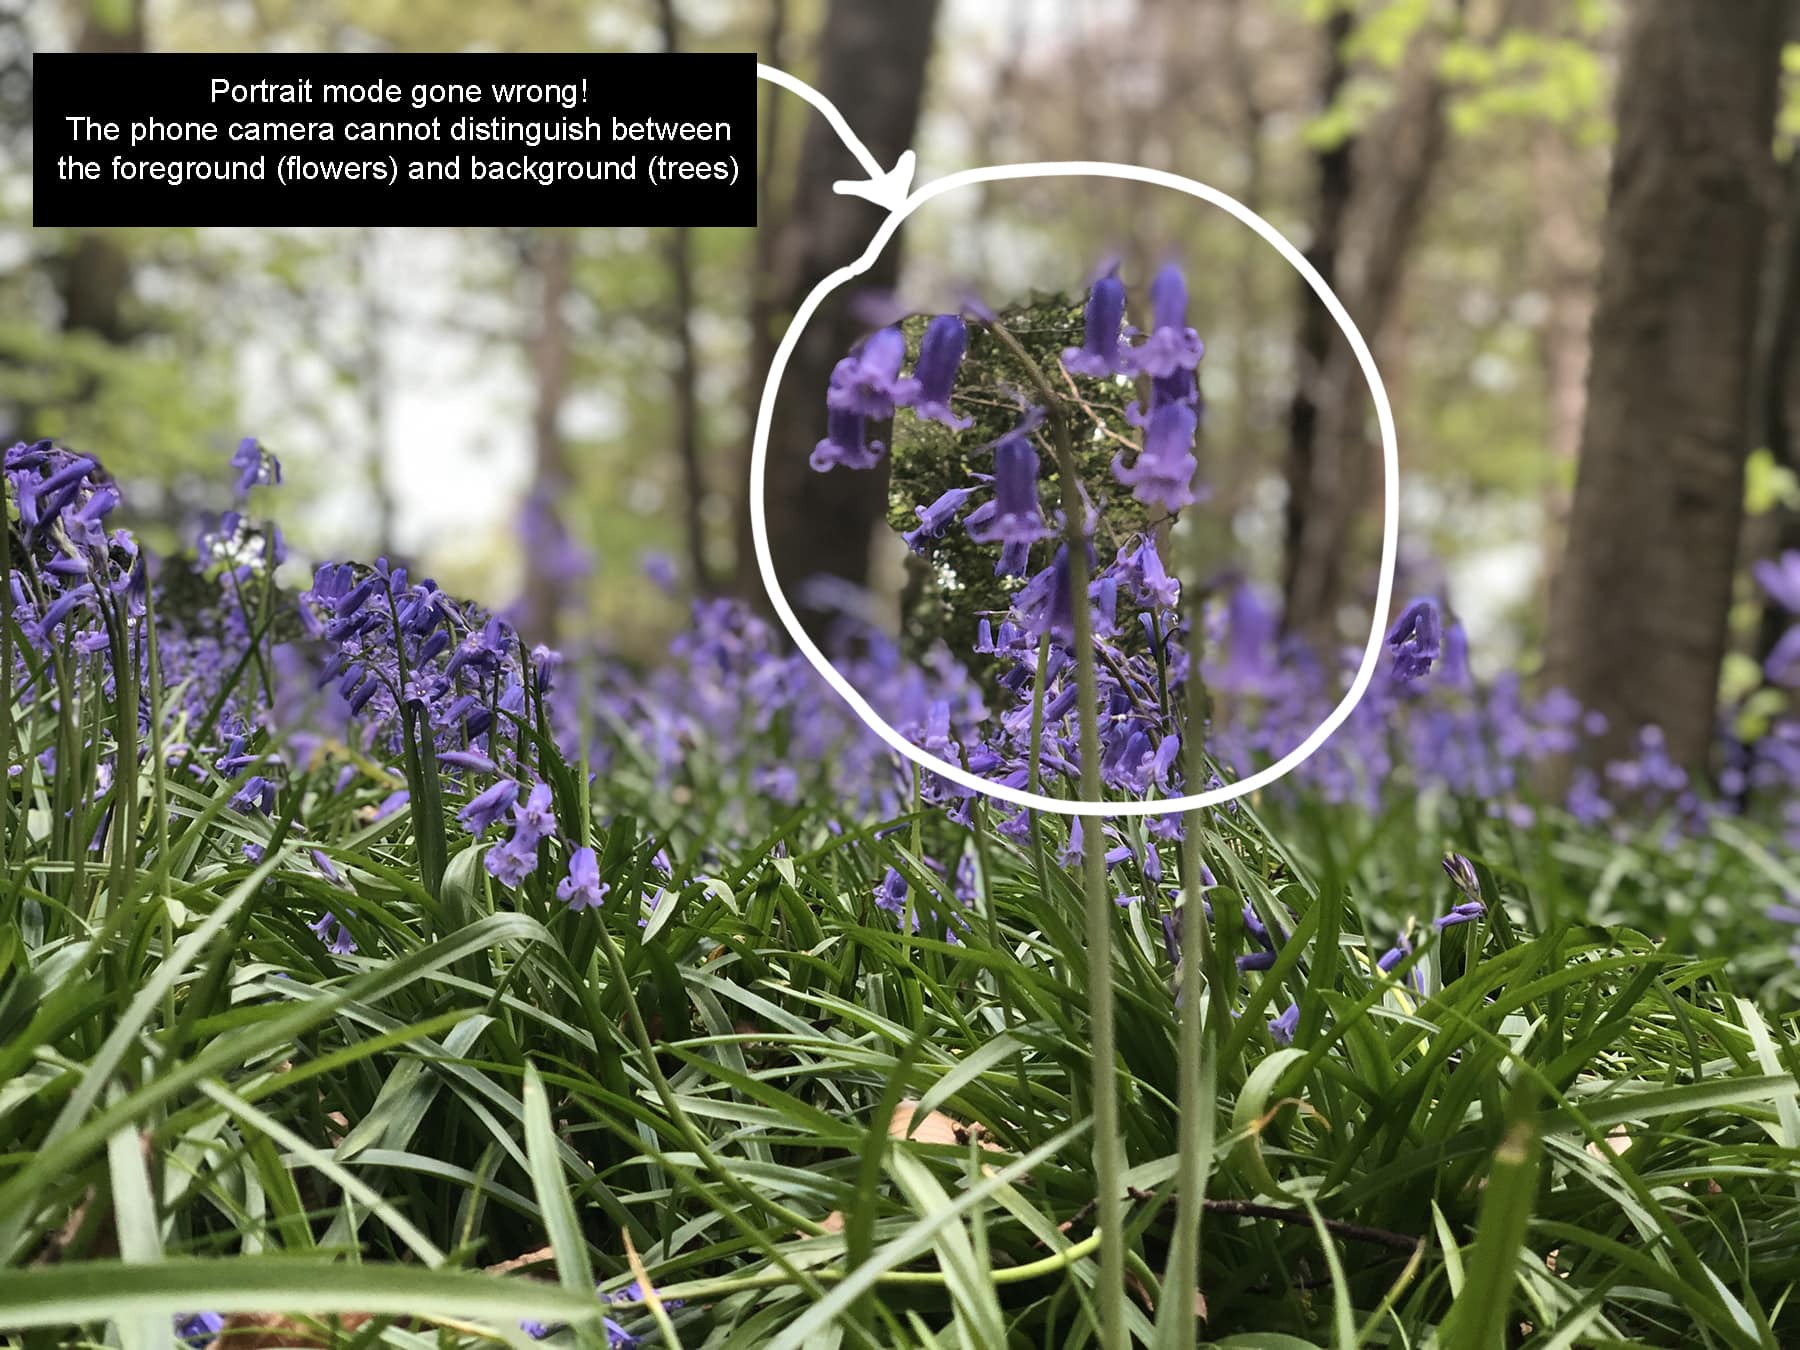
The newer iPhones (from iPhone 7/8 plus onwards) have Portrait mode which is a real game changer. Android phones have a similar feature which may be called Portrait mode or Live Focus, depending on your phone model. Essentially what these modes do, is to focus primarily on the subject in the foreground, allowing the background to fall out of focus, as in a classic portrait. This can give your photos real impact and even make it look like you have used a “proper camera”. It may take a bit of fiddling around to get this to work but it’s worth it. A few things to know:
- For best effects, you need separation between your foreground and background (subject/ background) ie you need your subject to be reasonably far away from the background so the phone camera can distinguish between the two.
- The distance between you and the subject is important – you may need to move forward or back a bit to get portrait mode to “lock on”. Usually the phone will let you know this and you will see it “ping” on screen

- Portrait mode works best on a “solid” foreground, typically like in a portrait of a person. Trying to take photos of things with gaps in (eg flowers) will not work as well as the phone camera will think the gaps in between are part of the foreground.


- Whilst I usually just use Portrait mode on the first setting “Natural Light”, there are several others, with my favourite being “Stage Light”. You don’t need to worry too much about these as you can always edit a photo afterwards by scrolling through these options. The first photo below is as taken (natural light) and the one on the right converted with one tap to stage light. Nice!


If you have enjoyed reading my tips for Smartphone Photography and would like to know more, then do get in touch. I will be running further Smartphone Photography workshops once Covid restrictions permit – and details can be found here. If you have a friend or relative who you think might be interested in attending a workshop then I also have Smartphone Photography Workshop Vouchers available (with extended availability) which can be found here.